This EOTD is supposedly my entry for a weekly challenge but failed to submit on time. Didn't want to waste my effort so I thought of posting it here instead.
The theme is spring colors and although we don't have spring in the Philippines I just thought of colors that reminded me of flowers.
This look makes use of pastel colors. I kept the makeup looking fresh and delicate. Made sure it is not over the top, just simple and pretty.
Showing posts with label Ellana. Show all posts
Saturday, April 7, 2012
Tuesday, March 13, 2012
How To: Correct and Conceal Dark Under Eyes
Poor diet, lack of sleep and graveyard shifts contribute to my lovely under eye circles. I'm not sure if you can see it in the picture but in person they are quite dark. I believe the ring flash adapter I'm using helped lighten the area a bit =P But I can't always bring with me my ring flash adapter nor a reflector hehehe So I have to find a way to hide them.
Normally, under eye circles are concealed by using a concealer that is a bit lighter than the actual skin color. This way it not only conceals the area but highlights it as well. However, this technique does not work for me (or for those who really have dark under eye circles) and the result usually is ashy under eyes. This is because of the bluish undertone that dark circles have and needs to be cancelled out. Color theory suggests that opposing colors cancel out each other so to correct blue undertone I have to use an orange corrector.
Friday, March 9, 2012
EOTD: Classic Smoky Eyes, The Easy Way...
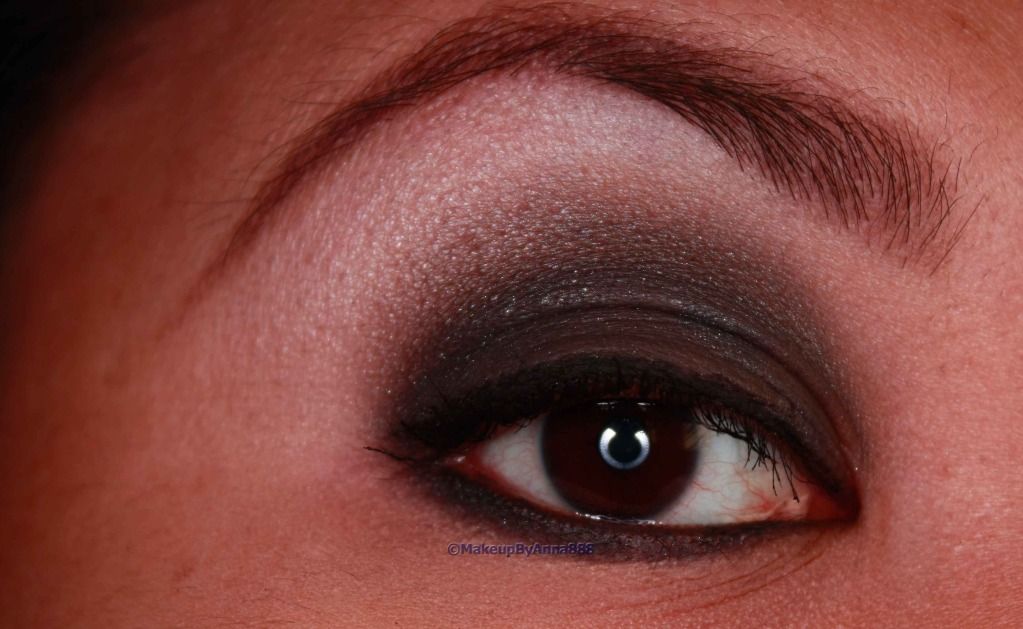
One of my favorite eyeshadow application techniques is the smoky eye. I find it the easiest way to do my eye makeup. Not only does it look dramatic but it also emphasizes the eyes which is my favorite facial feature. Some people shy away from smoky eyes especially during the day but I love it that I try to pull it off anytime of the day.
The classic smoky eye normally uses just one eyeshadow applied darkest at the lash line and blended upwards giving it a "smoky" effect. The gradient gives the illusion of using more than one color. Also, a smoky eye does not mean using only black or gray. This technique can be used in applying either dark (black, gray, brown, etc.) or bright, intense, vivid colors (red, orange, blue, green, yellow, pink, etc.). In this tutorial, I used a black eyeshadow because I love the drama. =P
Subscribe to:
Posts (Atom)